Because of the thickness of this ring I used my 1 inch mold frame and 10 sheets of Castaldo Gold Label Rubber.
Beginning to pack the mold. Every nook and cranny has to be well and throughly packed and the rubber sheets have to stay in the same alignment. Each layer requires 7 minutes in the vulcanizer. Sorry, there aren't more photos of this stage because Pat was dealing with the car and I got involved with the intriquicies of packing the mold!
Baking the mold! On the left and the bottom you can see the extra rubber being forced out as the pressure is increased.
Now where are my notes?!? This is why I zerox each master and then make notes right on that sheet! It takes a certain amount of visualization to cut the mold, but notes and illustrations sure help when it's time to start cutting!
Pat's back and all is well. Here I'm beginning the make a parting line cutting around the outside using a #11 scalpel.
Beginning to make the keying cuts; each corner will have a pyramid shape facing in alternating directions to help ensure the mold mates up perfectly.
Swithing to my #12 curved scalpel blade cutting along the sprue former and spreading the mold as far as I can as I cut. (Jeepers, I've put on weight!)
A closer view as I make what are called choppy wave cuts. They'll help the mold sides align. This is a mold cutting board that I made to fit on top of my old paperwork desk. When I need it I clamp it in place and the weight of the desk is critical as you're using a lot of pressure when cutting a mold! The bottle opener swivels underneath when not in use.
This mold was too thick for the pony clamp I have on an adjustable chain. It was just more efficent and safe to use my hands to pry it open as I cut. Here I'm using the straight scalpel to begin cutting the center plug free.
More shoppy wave cuts along the sides with the curved blade and then I was able to finish cutting the plug free. Once the center plug is free the master can be removed and the rest of the mold cut in two.
Finally, a two-part mold! Each cut has to be carefully planned to prevent parting lines, or flash, in the wax. Ideally the cuts should lie along or thgough an edge. Yes, it takes a little bit of practice.
Before I can use the mold I have to finish it by making relief cuts. They help the mold to flex, but more importantly they make it possible to remove the wax from the mold.
Here's a view of the plug side of the mold with relief cuts under it.
This isn't a very good shot but it gives you some idea of the relief cuts on the ring side of the mold. The four little black dots in the center are where the prongs will be; each one has its own relief cut.
That's the basics of packing and cutting molds. It's not that hard, it's intricate and it takes time, practice, and a fiddly attention to detail. Well, strong hands help too!
This is a good mold. It shot the first test waxes well and I didn't have to go back and cut any extra relief lines.
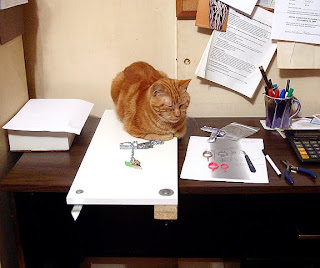
Later I went back into the ofice because I realized I had forgotten to put everything away . . . and there was Sam, ahem, "guarding" the new wax for David's ring!


No comments:
Post a Comment